
Monday, December 20, 2010
Wednesday, December 15, 2010
Tentative good news
Recently I asked an old friend of mine who used to weld for a living about helping me with my project. He was able to stop by last night to talk about the bike. As it turns, he is not only willing to show me how to weld, but excited to do so, since he's no longer doing it as a profession and misses it (damn economy). It also turns out he's got an old Yamaha 400 sitting in his yard that he's been considering trying to put back on the road.
In return for his help, I've offered up my garage, my tools and my limited knowledge to help him get his Yamaha back on the road. It was a daily rider a couple years ago, and it's complete, so it shouldn't be too bad.
After talking with him, I feel confident I'll be ready to send my frame out for powder in about a month or so.
Sunday, December 12, 2010
Friday, December 10, 2010
Here we go again
Okay. I have the next round of purchases figured out. To be bought with the next paycheck are:
On the Pariah:
- Harbor Freight welder, some wire and some practice materials.
- A used scroll saw and some extra blades.
- Carb rebuild kits and spark plugs for the GS.
- Sisal and Canton buffing wheels.
- Chemical gloves
- 09913-14511 (Fuel gauge set for float adjustments)
- 09900-20803 (tappet gauge)
- Suzuki fork oil #15
- Fork dust and oil seals
- Head cover gasket
- Breather cover gasket
- Gasket sealant
- New grips
- Oh yeah.....and a space heater
On the Pariah:
- Break down the front and rear wheels.
- Break down front forks.
- Remove engine side covers.
- Start polishing bits.
- Teach myself how to weld.
- Drain and pull the gas tank.
- Check air filters. If they're not factory, replace them with factory (may involve ordering airbox).
- Tune up (Rebuild the carbs and inspect boots, replace spark plugs, change oil filter along with primary, secondary and final drive oil, flush brake fluid).
- Replace head cover and breather cover gaskets.
- Mask off everything but the engine.
- Paint the case, cylinders and heads black.
- Polish side covers.
- Sand outside of cooling fins.
- Rebuild front forks.
- Replace mirrors and grips.
- Check valve clearances.
Wednesday, December 8, 2010
To hell with it....
.....I'm buying a welder and teaching myself. That shouldn't take hardly any time at all....
Hopefully I'll finish the bike some time in 2011. I'm no longer looking at a spring finish. It's possible, but highly unlikely. Thank fucking Christ for the GS. I'd go nuts with absolutely nothing to ride in the spring.
Hopefully I'll finish the bike some time in 2011. I'm no longer looking at a spring finish. It's possible, but highly unlikely. Thank fucking Christ for the GS. I'd go nuts with absolutely nothing to ride in the spring.
Wednesday, December 1, 2010
Fuckity fuck fuck fuck.
Well, sadly I have nothing new to report, aside from the fact that there is nothing new to report. I've been waiting on my wife's dad for the welding portions, as I'm not setup to weld. He's become very busy with other projects and hasn't had any time. Subsequently, I'm looking for a local welder to help me out, but I also want to learn some things, so yeah....it may take a couple of weeks to find someone.
On the bright side, I picked up an '82 GS1100 in good shape last week. I've already put 150 miles on it and it's fantastic. Power for days, smooth delivery and it's comfortable to ride. In short, I like it. I'd still like to get something more modern, and perhaps with a warranty, but for now this will do.
 How it looked when I got it.
 Holy Windshield, Batman!
Removed the windshield and replaced the handlebars with some euro superbike bars I had. This is how she sits now. I've since also removed the grab bar.


Almost a proper man-cave.

On the bright side, I picked up an '82 GS1100 in good shape last week. I've already put 150 miles on it and it's fantastic. Power for days, smooth delivery and it's comfortable to ride. In short, I like it. I'd still like to get something more modern, and perhaps with a warranty, but for now this will do.
How it looked when I got it.Holy Windshield, Batman!Removed the windshield and replaced the handlebars with some euro superbike bars I had. This is how she sits now. I've since also removed the grab bar.
Almost a proper man-cave.
Sunday, November 14, 2010
Appetizer
After hours of grinding, everything is finally smoothed out now. Some time in the next few days, I'll take the bike over to the FIL's for welding and fabrication of some bits. After quite a few hours of cutting and grinding, I was starting to feel a little bummed about not being able to see a lot in the way of results, so I decided to take a look at those new clip ons and rear sets on the bike.
As I'm not set up to weld, I cut some pieces of wood to length then drilled two small holes in each (for some wire) and one larger hole in each (for the rear sets). I ran some wire through the wood then attached the wood to the frame with the rearsets already mounted to get an idea of how everything will look.
 I like.

Notes: I'll have to modify the steering stops a bit. The bare clip-ons do not make contact with the tank, but the controls will. I've a couple ideas on how to do this already. I'll discuss them with Don (the FIL). Also, the top of the tree needs something. It either needs those useless tabs ground off, or it needs some type of plate over them. I already planned on running the neutral and signal indicators in the risers holes, but some type of plate could be added into that plan quite easily.

 A quick idea, but more of a jumping off point.....

 Could add some sections of rubber tubing as spacers, or could bend the plate. Not sure how to handle yet.
 Going to fab some type of mount that will hold the ignition under the tank using the horn mounts, and will mount the horn elsewhere - perhaps under the back of the headlight bucket?
As I'm not set up to weld, I cut some pieces of wood to length then drilled two small holes in each (for some wire) and one larger hole in each (for the rear sets). I ran some wire through the wood then attached the wood to the frame with the rearsets already mounted to get an idea of how everything will look.
 I like.
Notes: I'll have to modify the steering stops a bit. The bare clip-ons do not make contact with the tank, but the controls will. I've a couple ideas on how to do this already. I'll discuss them with Don (the FIL). Also, the top of the tree needs something. It either needs those useless tabs ground off, or it needs some type of plate over them. I already planned on running the neutral and signal indicators in the risers holes, but some type of plate could be added into that plan quite easily.

 A quick idea, but more of a jumping off point.....
 Could add some sections of rubber tubing as spacers, or could bend the plate. Not sure how to handle yet.
 Going to fab some type of mount that will hold the ignition under the tank using the horn mounts, and will mount the horn elsewhere - perhaps under the back of the headlight bucket?
Tuesday, November 9, 2010
Bike porn v2.0
 Thanks, Roc City.
In the near future....
- Finish grinding the frame smooth.
- Seat pan (Try and save/modify the old one or make new one)
- Fab mounting plates for the rear sets
- Fab battery box above swingarm and tray under seat for electrics.
- Mockup
- Disassemble triple tree
- Disassemble wheels
- Soda blast small parts
- Get everything ready for powder
Monday, November 8, 2010
Friday, November 5, 2010
Pseudo-update
Squeezed in another few hours on the bike today......
All the desired tabs have been removed from the frame, and I'm about 50% done grinding everything smooth. So, yeah, pretty much the same as yesterday.
Don't forget to check out the new Tarozzis.
Weight loss...

Already a vast improvement...


Bike porn.....

All the desired tabs have been removed from the frame, and I'm about 50% done grinding everything smooth. So, yeah, pretty much the same as yesterday.
Don't forget to check out the new Tarozzis.
Weight loss...

Already a vast improvement...


Bike porn.....

Thursday, November 4, 2010


Tuesday, November 2, 2010
The Silence of the Swingarms
I finally removed the swingarm bushings.


I had to cut a couple (well, to be honest, a few) relief lines down the length of the bushings, using a micro hacksaw. The key here is to cut all the way through the bushings without cutting into the swingarm itself. To do this, I would run the end of a straightened paper clip down the length of the cuts. I could feel from the pressure on the paper clip what sections required more sawing and what sections were cut through to the swingarm. After two lines were adequately cut in each bushing, I removed the sections between them. Then, the bushings were flexible enough to compress, and could be tapped out from the opposite side of the tube using a punch and mallet.

Tools of the trade -
In other news, I recently picked up a 20 gallon, 4hp air compressor (used off CL) as well as some new power tools; A DeWalt angle grinder and Harbor Freight (cheapy) sawzall.

 I've already started cutting the frame. With any luck, and a bit of determination, updates will start coming more frequently now.
 Wednesday, October 27, 2010
So, in the interest of updating, here is what I've been up to for the last week.
I've ordered my rear sets, clip-ons, and some stock CB360 headers (just in case my ideal exhaust situation doesn't pan out). I picked up the last of my needed polishing supplies, and have also purchased an air compressor, some air hose, and some attachments, and will be rigging up a home soda blasting setup.
I STILL have not gotten my swingarm bushings out. I've cut the relief sections in the bushings, but can't seem to get them out to compress the plastic. I'm certain that if I saw any deeper, I'll be going into the swingarm. But, alas, I also picked up a punch, the end of which I will wrap with a bit of electrical tape (so as not to gouge the swingarm) that I hope will get them out.
 When I get home today, I'm going to get my new compressor set up and start gearing up to do some soda blasting. And some polishing. Lots of polishing. Exciting times ahead for me.
In the mean time, here is a very rough mock up (I don't have Photoshop) of some of the changes I hope to make on the bike. This shows what a shortened seat pan, clip-ons and battery relocation could look like.
Monday, October 18, 2010
Updatelet

Update: Unfortunately there's not a lot to tell. A lot of my spare time recently has been spent organizing my garage, getting my work space set up, and cleaning/polishing nuts, bolts and etc.
In order to fully break down the swingarm, I had to buy a hacksaw, to cut a section out of each of the swingarm bushings. With any luck, this will make them easier to remove. I'm still trying to work out how to remove the rear suspension bushings. Plus side - At least I got the swingarm collar out.
I'll be ordering my clip-ons and rear sets in just a couple of days. Their arrival will presumably bring more and better updates.
 I was also able to get the covering off my seat, and the foam removed from the seat pan. What I found was fairly disappointing.
First, it's fairly rusted. Also, it appears that the previous owner affixed the old cover by snagging it over metal spikes that were poked out using an old can opener. It could be factory, but I have a hard time believing that.
 The question for the seat pan has become, as asked by the Clash, should it stay or should it go now? That rust seems problematic.
Next on the plate:
- Get bushings out of swingarm.
- Order Clip-ons and rear sets.
- Make seat pan decision.
- Mock up.
- Get triple tree disassembled.
- Chop and grind frame down.
- Sandblast frame, wheels, swingarm, rotors, triple tree.
- Get crank case covers off the engine.
- Learn how to use all this polishing shit.
- Get a new, smaller battery and build a box.
- Rebuild front forks.
- Get a space heater for the garage.
Thursday, October 14, 2010
Down time
Not much going on with the bike at the moment. I can't pick up any new parts for about another week, so I've just been picking up things I need for cleaning and polishing. I bought an angle grinder, but then had to return it when I read in the manual that it wasn't rated to cut metal. Might have been cool for the employee to tell me that when I bought it - along with ten cutting discs. I'll pick up a replacement for it today.
HD Theater began airing Cafe Racer last night. I was only able to get the first of two episodes watched last night, but it was great. Awesome to see the pics and footage from the old Ace Cafe.
Met a cool guy on a BSA Lightning Bolt last night after work. He ran out of gas alongside the highway, so I hooked him up with a gallon of super to get him home. I could see that he was wearing an Ace Cafe jacket, and he was about to start pushing his bike along the highway. Turns out he's a member of Oregon Vintage Motorcyclists, a group I've had lunch with and am thinking of joining. Hell of a guy. Hope to talk to him again in the future.
Anyways, to add some beauty to the page, this is similar to what he was riding.

Sunday, October 10, 2010
Disassembled.
 Everything is disassembled. Well, as much as it can be right now. I have to mock up the tank, clip-ons, seat pan and (separately) the rear cowl, before going any further.
In the ten days or so before I can order my clip-ons and rear sets, I should be able to get some cleaning in on some of the bits, but I'm going to hold off on rebuilding the forks or wheels or anything until after the mock-up. Plenty of time.
I also have to give my father-in-law some warning that his welding, fab and paint services will be needed soon.
Friday, October 8, 2010
More disassembly
 I got some more taken off the bike last night. The rear axle was a pain in the ass. I used a hammer to get the left side out enough to wrap a cloth around the head of the axle and tugged while twisting. It probably took close to a half hour just to pull the rear wheel axle.
Still to go is the triple tree and steering stem parts, the kickstand, swingarm, rear shocks, footpegs and chain. Not looking forward to the chain, but maybe the third time is the charm.
 It will be a couple weeks before I can get my clip-ons and rear sets, so in the mean time I'm going to rebuild the front forks, start on the front wheel and get polishing on some bits and pieces.
I'm trying to figure out if I want to powdercoat the wheels and hubs, or paint them. I've heard powder can make relacing the spokes a pain in the ass, but I know it's more durable. An alternative would be to find a durable paint and use that. I'm also trying to figure out the best paint to use for the cylinder head.
Thursday, October 7, 2010

Wednesday, October 6, 2010
Trying to avoid a lack of posts
Just a slight bit of progress. I put the bike back down on the wheel chalk and drained the oil. I tried to get the chain off, but was unable. I'll reference the shop manual today on how to do that, and of course how to pull the motor.
At first, I was a little intimidated at the thought of pulling the motor, but I now feel confident I can do it without assistance (once I get the chain off). I told Emily I'd be spending tonight in the garage, so hopefully I'll be able to get it done.
Today, on my lunch, I'm picking up an angle grinder, some cutting discs, and some sanding/polishing/cleaning supplies.
Monday, October 4, 2010
A quick mock-up
Some progress has been made on the tear-down.
 First, a quick mock-up to wet the palette. The rear cowl has been moved forward, which will require modification to the seat pan. This is also using the stock tank, which is kind of a worst case scenario. I'd really like to find a GS 450E tank from an '80 or '81.
I managed to forget to drain the oil up to this point, so that's next on the list.
Once the oil is drained, it will be time to pull the motor, then the wheels and suspension.
Then, it's a lot of cleaning, cutting, grinding and polishing.

Here she is after day two. I have shit tons of questions, but very few answers. Thank God for forums. As no one is actually reading this blog, I'm going to state my questions here for organizational purposes.
 Trying to stay organized.
 Not sure if that fender is worth saving or not. One of the mounting tabs was broken and fell apart in my hands when I removed it from the forks. There are aftermarket fenders available, but I may be able to salvage this one.
 First, a quick mock-up to wet the palette. The rear cowl has been moved forward, which will require modification to the seat pan. This is also using the stock tank, which is kind of a worst case scenario. I'd really like to find a GS 450E tank from an '80 or '81.
I managed to forget to drain the oil up to this point, so that's next on the list.
Once the oil is drained, it will be time to pull the motor, then the wheels and suspension.
Then, it's a lot of cleaning, cutting, grinding and polishing.

Here she is after day two. I have shit tons of questions, but very few answers. Thank God for forums. As no one is actually reading this blog, I'm going to state my questions here for organizational purposes.
- In how many places does the wiring harness/electrical system ground to the frame? During dismantling I found a random green (ground) wire that looks like it grounded somewhere, and I believe it was in the gauge bracket, but I'm not sure.
- Can I create a custom bracket for the ignition lock cylinder and get rid of the ugly stock bracket (will be integrating the speedo into the headlight bucket and eliminating the tach)?
- What does the random bolt on the underside of the frame, just under the crankcase, do?
- How do I remove the speedo cable from the front rotor?
- How do I remove the tach cable from the engine?
- Is there a smaller, sealed, compatible replacement for my battery (that will still allow me to use lights & blinkers)?
 Trying to stay organized.
 Not sure if that fender is worth saving or not. One of the mounting tabs was broken and fell apart in my hands when I removed it from the forks. There are aftermarket fenders available, but I may be able to salvage this one.
Thursday, September 30, 2010
...And So it Begins
Well, the bike started running really terribly yesterday. Upon getting home, I had one badly fouled plug. The first thing I thought about doing is a carb cleaning, but for what? Two more weeks of riding? This is the NW. It's quite likely the weather forecast would change just as I'm getting everything back together, and the sun will go away until June. I opted to just start the tear-down now. Unfortunately, I was tied up until just after 10pm last night, so I wasn't able to get too much done before I simply had to go to bed.
 It'll likely be another late start tonight, but here is a pic from last night, just before I called it for the evening. I've got the headlight assembly, front turn signals, gas tank, exhaust, mirrors, levers, seat and seat cowl removed.
Tonight I'm shooting for the handlebars, side covers, battery box and airboxes, brake light, both fenders, carburetors and all the cables.
I'm trying to go over the best ways to keep this organized in my head. I'm thinking I should be okay. First of all, I want to keep it simple. One thing at a time. I plan to take a lot of pictures for reference, and keep parts organized in little labeled bags.
I'm not really sure what needs to be done when it comes to the head. I know I want to have it looked at, and possibly resurfaced/honed/bored/whatever, but I'm not sure what I have to do to it in preparation (pull the pistons, clean it up a bit and what else). Also, I'm not sure if I want to paint it or leave it. Also, what's the best way to clean the block? I'll be polishing the crankcase covers, stator cover, etc., but is sandblasting or something the best way to clean the block?
Monday, September 27, 2010
Meh
Well, at least one day out of the weekend was nice. On Saturday I rode down to Portland to watch OSU get man-handled by Boise State. Then, afterwards, it was a trip back up to Vancouver for the PNW Riders Vancouver Bike Night. Somewhat small turnout, as the group is in between meeting places, but it was a great group of people.
The bike has developed a bit of an oil weep. The leak appears to come from the left side carburetor intake boot. It's not a major leak, so I'm not going to worry about it right away.
Right now I'm dealing with an enormous internal conflict. I really want to start tearing the bike apart, but I'm not yet ready to give up my one or two days a week that I'm able to ride. I really need a new bike. Something newer and reliable. Just need money first. Damn the obstacles.
Wednesday, September 22, 2010

Monday, September 20, 2010
Obligatory cliche pics
The last pictures before the tear down......


I'm starting to have to resist the urge to start taking it apart. The poor weather can be a good thing.....


I'm starting to have to resist the urge to start taking it apart. The poor weather can be a good thing.....
Inspiration
This is, without a doubt, the best looking CJ360T cafe racer I've ever seen.
If I can get mine looking half as nice, I'd be a happy man.


If I can get mine looking half as nice, I'd be a happy man.


Decisions, Decisions...
I attempted to clean my centrifugal oil filter this weekend while changing the oil, but no go. The right side crank case cover is stuck on the engine quite well. I'm curious as to what the previous owner used to seal the gasket, because the sealer he used is a different color from the Hondabond HT I picked up. I also wish I knew what to use to get that crank case cover off. Back to the forums I guess....I'm looking forward to getting all this knowledge stored away so I don't have to ask stupid questions of people....
On the bright side, I did get the oil changed, and while I had the exhaust off, I cleaned it up, and cleaned and lubed my drive chain. I've also tentatively decided the direction I'd like to take the build in:
Tank: 1981 GS450E, though it may be hard to find. I am determined, and have plenty of time (I'm starting the search now).
Seat: I'm going to modify the seatpan, making it a solo seat, and move the stock CJ360 cowl forward, chopping the fame in the back. I'll attempt to find a way to keep the tool compartment accessible. There is just something cool about having the factory tool kit.
Electrics: I know for certain that I'll be going with a Benjie's headlight bucket with the integrated factory speedo. I'm going to ditch the tach, and place the neutral/signal indicator lights in the tree somewhere (perhaps in the riser mounting holes if I go with clip-ons). Still deciding whether or not I want to relocate the battery, as that would involve ditching the factory side covers and air cleaners, and going with POD filters. I'm not sure I'm up to the task of jetting.
Exhaust: Unless I find something better, scrambler pipes off a CL360. I basically just want the exhaust moved somewhere else. It's too much of a hassle to remove the exhaust to get to the oil filter. See above about pod filters.
Suspension: Stock front forks, but lowered 1", perhaps with a little bit of preload. Progressive rear shocks. Bronze swingarm bushings.
Color scheme: Two tone - dark grey and black, with the frame powdered in dark grey. Wheel spokes painted black, wheels chrome.
I'll decide on rear sets once I decide permanently on the handlebars. I like the CB400F bars, but might decide to use clip-ons. If I do, I'll probably pick up some Tarozzis.
Friday, September 17, 2010
Introductions are in order.....
You have somehow managed to find yourself staring at my '77 Honda CJ360 build. Lucky you. What lies beyond this point, I'm not really sure. I've gone back and forth in my head about what I'd like to accomplish out of this process, and I'm still undecided. I guess that's just part of the adventure.
I'm a 32 year old IT Professional living in the amazing and picturesque Pacific NW. I have a wife and two kids, two dogs and a passion for motorcycles. My wife and I share many things, but a love of two wheeled speed is not one of them. I owned bikes before we were married (never worked on them myself), but only recently have I been able to talk her into letting me acquire one. Of course, there were some restrictions.
1. It had to be cheap
Okay, only one restriction.
After some looking and a bit of luck, I happened upon this '77 Honda CJ360T for next to nothing in late June. I had never heard of a CJ before, but it looked pretty close to the CBs I'd seen many times. The bike would run, but not very well, and the turn signals did not work. There was a decent amount of surface rust on the exhaust, forks, signal stems, basically anything chrome, but nothing too serious. It was, however, complete, and had a title.
Here is the bike the night I picked it up.

My original plan was to get the bike back on the road, and ride it for the summer, before tearing it down over the winter to rebuild. I also wanted to do some cosmetic modifications....mainly those grandlebars were annoying the hell out of me.
 Pictured is the right side carburetor. The left side was noticeably worse, but I'm not sure what happened to the picture I had of it.
Upon removing the carbs, I found that the air filters were in need of replacement. The left side was easy enough to find, but the right side had to be ordered from Holland. I also drained and refilled the tank, cleaned the petcock, and replaced the inline fuel filter.
 Carbs rebuilt and reinstalled, new air filters installed. I adjusted the valve clearance, replaced the points, and adjusted points and timing. My inexperience coupled with the wrong tools made these steps a pain in the ass. I strongly suggest anyone doing the valve clearance on one of these old Hondas pick up a Motion Pro tappet gauge. They're the perfect size, and bent to shape. I tried bending a straight feeler gauge first, but was unsuccessful in getting a good reading from it. Even with the right tool, it took me a few tries and probably a week to get everything nailed down.
All cleaned up.

Rewired the turn signals, replaced the flasher and the signals work!
Next step was replacing a clutch cable that didn't seem to be engaging properly.
 The inside of the sprocket cover. Nice and clean, eh?
 Dirty clutch guts.
 I'll do a better job of cleaning these parts up this Winter. Right now, though, I want to ride. This will do.
Now everything seemed to be running well. And, since there were a few more weeks in the season, I thought it might be fun to try and swap the handle bars out and get a few rides in before the weather changed.
 New NOS handle bars (Off a '76 CB400F), grips, levers and a set of EMGO bar-end mirrors should make a huge difference in the appearance and feel of the bike.
 I hate stripped screws. Seriously.
 Got that bastard.
 Finally got the old bars off.
 New bars, grips and levers mounted.
I figured I might as well do the turn signals while I'm at it. After some rerouting and tweaking of the cables, she looks like this.....

The end of the season is getting close. I'm starting to look forward to the tear down, and get an idea of what I might be looking to accomplish. In this initial post, I've attempted to squeeze two months worth of ownership into one rambling juggernaut, but subsequent posts will be more segmented to match the project I'm working on at the time.
I'm a 32 year old IT Professional living in the amazing and picturesque Pacific NW. I have a wife and two kids, two dogs and a passion for motorcycles. My wife and I share many things, but a love of two wheeled speed is not one of them. I owned bikes before we were married (never worked on them myself), but only recently have I been able to talk her into letting me acquire one. Of course, there were some restrictions.
1. It had to be cheap
Okay, only one restriction.
After some looking and a bit of luck, I happened upon this '77 Honda CJ360T for next to nothing in late June. I had never heard of a CJ before, but it looked pretty close to the CBs I'd seen many times. The bike would run, but not very well, and the turn signals did not work. There was a decent amount of surface rust on the exhaust, forks, signal stems, basically anything chrome, but nothing too serious. It was, however, complete, and had a title.
Here is the bike the night I picked it up.

My original plan was to get the bike back on the road, and ride it for the summer, before tearing it down over the winter to rebuild. I also wanted to do some cosmetic modifications....mainly those grandlebars were annoying the hell out of me.
 Pictured is the right side carburetor. The left side was noticeably worse, but I'm not sure what happened to the picture I had of it.
Upon removing the carbs, I found that the air filters were in need of replacement. The left side was easy enough to find, but the right side had to be ordered from Holland. I also drained and refilled the tank, cleaned the petcock, and replaced the inline fuel filter.
 Carbs rebuilt and reinstalled, new air filters installed. I adjusted the valve clearance, replaced the points, and adjusted points and timing. My inexperience coupled with the wrong tools made these steps a pain in the ass. I strongly suggest anyone doing the valve clearance on one of these old Hondas pick up a Motion Pro tappet gauge. They're the perfect size, and bent to shape. I tried bending a straight feeler gauge first, but was unsuccessful in getting a good reading from it. Even with the right tool, it took me a few tries and probably a week to get everything nailed down.
All cleaned up.
Rewired the turn signals, replaced the flasher and the signals work!
Next step was replacing a clutch cable that didn't seem to be engaging properly.
 The inside of the sprocket cover. Nice and clean, eh?
 Dirty clutch guts.
 I'll do a better job of cleaning these parts up this Winter. Right now, though, I want to ride. This will do.
Now everything seemed to be running well. And, since there were a few more weeks in the season, I thought it might be fun to try and swap the handle bars out and get a few rides in before the weather changed.
 New NOS handle bars (Off a '76 CB400F), grips, levers and a set of EMGO bar-end mirrors should make a huge difference in the appearance and feel of the bike.
 I hate stripped screws. Seriously.
 Got that bastard.
 Finally got the old bars off.
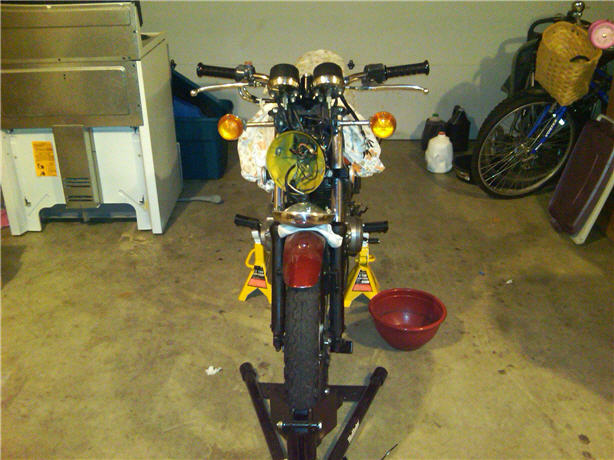 New bars, grips and levers mounted.
I figured I might as well do the turn signals while I'm at it. After some rerouting and tweaking of the cables, she looks like this.....
The end of the season is getting close. I'm starting to look forward to the tear down, and get an idea of what I might be looking to accomplish. In this initial post, I've attempted to squeeze two months worth of ownership into one rambling juggernaut, but subsequent posts will be more segmented to match the project I'm working on at the time.
Subscribe to:
Posts (Atom)